The System File Checker (SFC) is a command-line tool that scans for and repairs corrupted system files. In some cases, SFC can’t fix all the problems itself and you’ll need to use the DISM command prompt to repair some errors. Here’s how to do it.
What Is the System File Checker Command Prompt and What Does It Do?
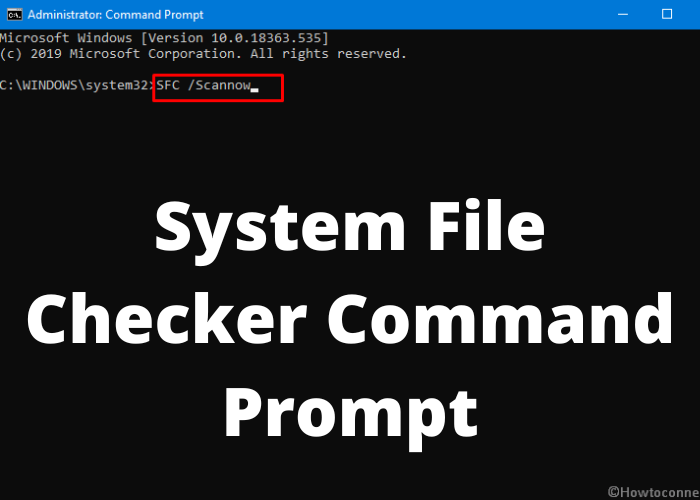
The System File Checker is a command prompt utility in Windows that allows you to scan your system for corrupt or missing files and repair them if possible. To use it, you’ll need to open the Command Prompt with administrator privileges. Once you’re at the prompt, type “sfc /scannow” and hit Enter. The scan will take a few minutes to complete, and if any problems are found, they will be repaired automatically. Keep in mind that the System File Checker only works with files that are part of Windows, so it can’t fix any problems with third-party programs or drivers. Additionally, it’s always a good idea to create a backup before running any commands that could potentially delete or damage files on your system.
How To Run the System File Checker Command Prompt on Your Computer
The System File Checker is a utility in Windows that allows users to scan for corruptions in Windows system files and restore them. It is a command-line tool that can be used to verify the integrity of your Windows system files. To run the System File Checker, open the Command Prompt and type “sfc /scannow”. This will scan all of your Windows system files and attempt to repair any that are corrupted. You may be prompted to provide administrator permission to run the scan. Once the scan is complete, you should see a report of any corruptions that were found and fixed. If you continue to experience problems with your Windows system, you may need to perform a clean installation.
What To Do if You Find Errors After Running the System File Checker Command Prompt
If you find errors after running the system file checker command prompt, there are a few things you can do to fix the problem. First, try running the command prompt again with the /r switch. This will scan your hard drive for errors and attempt to repair them. If this doesn’t work, you can also try running the chkdsk command. This will scan your hard drive for errors and correct them if possible. Finally, if all else fails, you can try restoring your system from a recent backup. This will replace any damaged files with clean copies from your backup. If you don’t have a recent backup, you can try using a recovery disc or installing a fresh copy of Windows.
How To Fix Common Errors That Can Occur When Using the System File Checker Command Prompt
The system file checker command prompt is a powerful tool that can help you fix common errors on your computer. However, if you don’t use it correctly, you may end up causing more problems than you solve. Here are some tips for using the system file checker command prompt:
- First, make sure that you have a backup of your files before you run the system file checker. This way, if something goes wrong, you’ll be able to restore your files from the backup.
- Next, open the Command Prompt and type “sfc /scannow”. This will scan your hard drive for errors and attempt to fix them.
- Once the scan is complete, restart your computer and see if the problem has been fixed. If not, you can try running the system file checker again with different options. For example, you can try running “sfc /verifyonly” to check for errors without attempting to fix them.
By following these tips, you can use the system file checker command prompt to fix common errors on your computer without causing any further problems.


Comments